Post-Production for Documentaries: Unique Challenges and Solutions
Post-production is where the magic happens in documentary filmmaking. It’s the stage where countless hours of footage are transformed into a compelling narrative that captivates audiences. But for many indie filmmakers, post-production can also be the most daunting part of the process.
In this blog post, we’re diving into some of the unique challenges that documentarians face during post-production and providing practical solutions to overcome them. From color correction to legal concerns, we’ll cover the key obstacles and offer tips to help you navigate this critical phase smoothly.
Whether you’re a seasoned filmmaker or just starting out, understanding the ins and outs of post-production is essential. By the end of this post, you’ll have a clearer picture of what to expect and how to tackle the various hurdles that come your way. So, let’s roll up our sleeves and explore the fascinating world of documentary post-production.
Challenge 1: Managing Massive Amounts of Footage

One of the most daunting tasks in documentary post-production is managing the massive amounts of footage collected during filming. Documentaries often involve extensive shooting, resulting in hundreds of hours of raw footage that needs to be organized and reviewed. This can quickly become overwhelming, especially for indie filmmakers working with limited resources.
Organizing Footage
Effective organization is the first step in managing large volumes of footage. Here are some tips to help you stay on top of your material:
- Label Everything: Clearly label all footage with detailed descriptions, including the date, location, and key subjects or events captured. This makes it easier to find specific clips later.
- Create a System: Develop a consistent system for categorizing your footage. This could be by theme, interviewee, or chronological order. Use folders and subfolders to keep everything tidy and accessible.
- Use Metadata: Take advantage of metadata to tag your clips with relevant keywords. This additional layer of information can save time when searching for specific footage during the editing process.
Editing Software
Choosing the right editing software is crucial for managing and organizing your footage effectively. Here are a few recommendations:
- Adobe Premiere Pro: Known for its robust organizational tools and flexibility, Premiere Pro is a favorite among professional editors.
- Final Cut Pro X: This software offers powerful media management features and is particularly user-friendly for Mac users.
- DaVinci Resolve: A free option that doesn’t compromise on features, DaVinci Resolve provides excellent editing and organizational capabilities.
Efficient Workflow
Establishing an efficient workflow can significantly streamline the post-production process. Consider the following tips:
- Create a Rough Cut: Start with a rough cut to get a sense of your story’s structure. This doesn’t need to be perfect but should include the main elements of your documentary.
- Break It Down: Divide your project into smaller, manageable sections. Tackle one segment at a time to avoid feeling overwhelmed.
- Regular Reviews: Schedule regular review sessions to assess your progress and make necessary adjustments. This helps keep the project on track and ensures that the final product meets your vision.
By implementing these strategies, you can effectively manage the vast amounts of footage typical in documentary post-production. Staying organized, using the right tools, and maintaining an efficient workflow will help you navigate this challenge with confidence and ease.
Challenge 2: Legal Considerations

Navigating legal considerations is a crucial aspect of documentary post-production. Documentarians must ensure they have the proper permissions and adhere to ethical storytelling standards. This process can be complex and challenging, especially for indie filmmakers who may not have extensive legal resources.
Clearances and Releases
Securing the necessary clearances and releases is vital to avoid legal issues down the road. Here are some steps to follow:
- Obtain Releases: Always get signed release forms from interviewees and anyone prominently featured in your documentary. This includes location releases for shooting in private or restricted areas.
- Music and Media Rights: Ensure you have the rights to any music, photographs, or archival footage used in your film. This may involve purchasing licenses or obtaining permission from the copyright holders.
- Legal Consultation: Consider consulting with a legal expert who specializes in media law. They can provide guidance on any potential legal pitfalls and help ensure your documentary complies with all necessary regulations.
Fair Use Guidelines
Understanding and applying fair use principles can be tricky, but it’s essential for including copyrighted material in your documentary. Here are some key points:
- Purpose and Character: Use copyrighted material in a transformative way that adds new meaning or message. Commentary, criticism, and educational uses are often considered fair use.
- Amount and Substantiality: Use only the amount of the work necessary to achieve your purpose. Avoid using large portions of copyrighted material.
- Effect on Market Value: Ensure your use of the copyrighted material does not negatively impact its market value. If your use could substitute for the original work, it may not be considered fair use.
Addressing these legal considerations during post-production is crucial for creating a documentary that is both legally sound and ethically responsible. By securing the necessary permissions, understanding fair use, and committing to ethical storytelling, you can ensure that your documentary respects both the law and the people it portrays.
Challenge 3: Color Correction and Grading
Color correction and grading are essential components of post-production that significantly impact the visual appeal and emotional tone of your documentary. However, achieving the perfect color balance and grading can be challenging, especially for indie filmmakers who may lack advanced equipment and experience.
Solutions
Understanding the Basics
A solid understanding of the basics can go a long way in color correction and grading. Here are some foundational concepts to get you started:
- Color Correction: This process involves adjusting the colors in your footage to achieve a natural and consistent look. It ensures that all shots have balanced exposure, contrast, and white balance.
- Color Grading: After correcting the colors, grading adds stylistic effects to enhance the visual storytelling. This step can set the mood and tone of your documentary, making it more engaging and impactful.
Using the Right Tools
Selecting the appropriate tools can make color correction and grading more manageable. Here are some recommendations:
- DaVinci Resolve: Known for its powerful color grading capabilities, DaVinci Resolve is a favorite among filmmakers. The free version offers extensive features that can meet most of your post-production needs.
- Adobe Premiere Pro: Another industry-standard software, Premiere Pro, provides robust color correction and grading tools, making it a versatile choice for indie filmmakers.
- Final Cut Pro X: Ideal for Mac users, Final Cut Pro X offers intuitive and effective color correction and grading options.
Practical Tips
Here are some practical tips to help you achieve professional-quality color correction and grading:
- Consistency: Ensure that all your footage has a consistent color balance and exposure. This creates a cohesive look throughout your documentary.
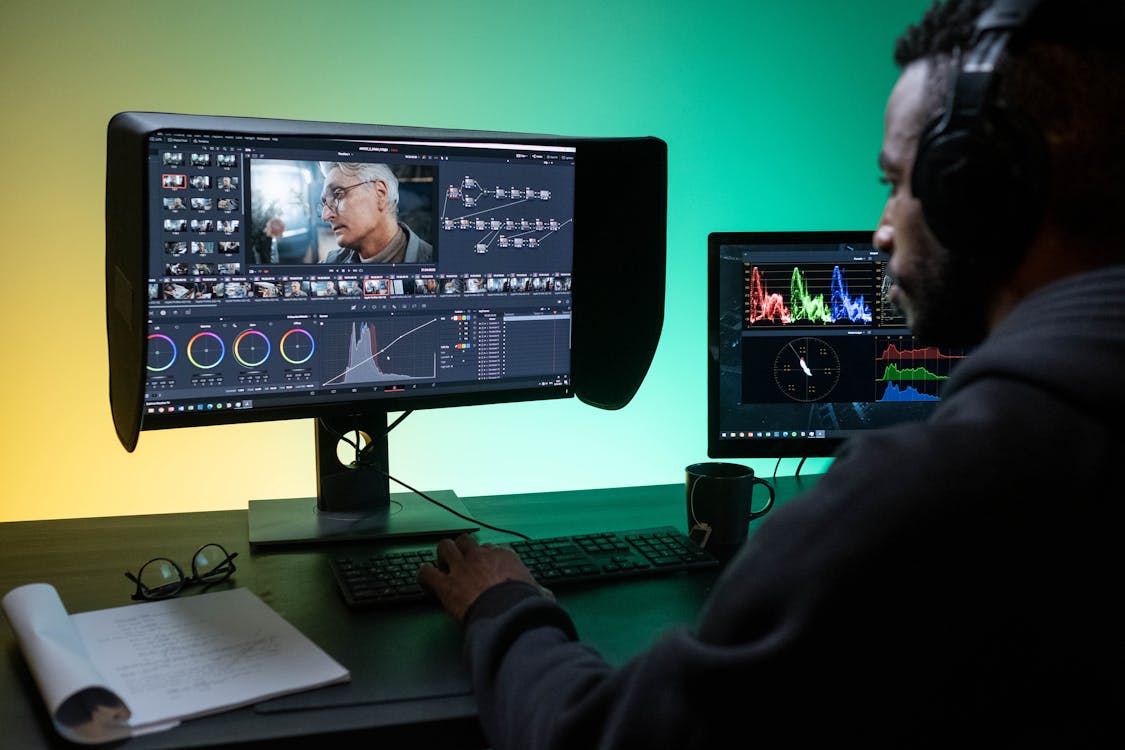
- Scopes and Monitors: Use video scopes (like waveform monitors, vectorscopes, and histograms) to make precise adjustments. Reliable reference monitors can also help ensure color accuracy.
- Presets and LUTs: Look for color grading presets and LUTs (Look-Up Tables) that can provide a good starting point for your grading process. These tools can save time and offer creative inspiration.
- Practice and Experimentation: Color grading is as much an art as it is a science. Spend time experimenting with different looks and styles to find what best suits your documentary’s narrative and emotional tone.
Color correction and grading are vital steps in post-production that can elevate the visual quality of your documentary. By understanding the basics, using the right tools, applying practical tips, and seeking professional help when possible, you can overcome the challenges of color correction and grading, ensuring your documentary looks its best.
Challenge 4: Budget Constraints

Budget constraints are a common challenge in documentary post-production, especially for indie filmmakers. Limited financial resources can restrict access to high-end equipment, software, and professional services, making it difficult to achieve the desired quality and polish. However, there are ways to work around these limitations without compromising your documentary’s impact.
Cost-Effective Tools
Finding affordable yet powerful tools is key to managing post-production on a tight budget. Here are some recommendations:
- Free and Low-Cost Software: Look for free or low-cost editing software like DaVinci Resolve, which offers a comprehensive set of post-production tools. Audacity is a great free option for sound editing.
- Open Source and Free Resources: Utilize open-source and free resources for music, sound effects, and stock footage. Websites like Free Music Archive and Pixabay can be invaluable.
- Cloud-Based Solutions: Consider cloud-based editing platforms like WeVideo, which offer robust features at a fraction of the cost of traditional software.
DIY Tips
Embracing a do-it-yourself approach can help stretch your budget further. Here are some practical tips:
- Learn the Basics: Invest time in learning the basics of editing, sound design, and color correction. Online tutorials and courses on platforms like YouTube and Coursera can provide valuable skills without the cost of formal education.
- Repurpose Equipment: Use what you have. Your existing camera, smartphone, or computer can often handle much of the post-production work, especially with the right software.
- Collaborate with Peers: Network with other indie filmmakers and consider bartering skills and services. Offering your expertise in one area in exchange for help in another can be mutually beneficial.
Crowdfunding and Grants
Securing additional funding can alleviate some of the financial pressure. Here are some options:
- The Film Fund: By winning our short film funding contest, you could earn up to $10,000 in funding for the production of your short film. Unlike other funding avenues, we don’t require a full script. Instead, we ask for one sentence summarizing your film and why you need our help.
- Crowdfunding: Platforms like Kickstarter and Indiegogo allow you to raise funds directly from your audience. Craft a compelling campaign highlighting your documentary’s value and unique aspects to attract backers.
- Local Funding Sources: Explore local arts councils and community organizations that may provide financial support for creative projects.
By leveraging cost-effective tools, embracing DIY strategies, and seeking additional funding through crowdfunding and grants, you can overcome budget constraints in documentary post-production. These approaches can help you achieve a high-quality film without breaking the bank, ensuring your documentary reaches its full potential.
In Conclusion
Post-production is a critical phase in documentary filmmaking, presenting a unique set of challenges that indie filmmakers must navigate. From managing massive amounts of footage to crafting a compelling narrative, addressing legal and ethical considerations, ensuring high-quality sound design, and working within budget constraints, the journey can be daunting but also incredibly rewarding.
Embracing these challenges head-on is part of the creative process that defines documentary filmmaking. Each obstacle you overcome enhances your skills and enriches your storytelling. Remember, every documentary has the potential to make a significant impact, and your dedication to post-production plays a crucial role in bringing your vision to life.
Don’t forget to head to our entry page for our short film funding contest to learn more and enter ASAP!